Giveaway on my New Site!

Hey Guys,

Just a reminder that I moved to a new web address: http://pinteriordesigner.com . A huge reason for the move is to host giveaways…and I am! Don’t miss out on my first ever giveaway– Rust-Oleum Countertop Coating! Click here to go enter the giveaway. That’s the stuff I used to take my counters from this:

Counters right of sink before 2

to this!

counters after right side of sink 2

You have until Tuesday to enter. Don’t miss this! Good luck!

Chelsea


Moving on Up!

Hey Guys- I know I’ve only been blogging for a hot minute, but I’ve switched domain names. I wanted to hold giveaways and add in more features to make the blog more user-friendly. Check out http://pinteriordesigner.com to follow along with my projects, read awesome home how-to’s, and access to sweet giveaways. Thanks!!

george-jefferson

Well That’s Pinteresting… {Target Killed Me Edition}

Last week, my friend Robin and I, did a little Christmas decor scouting at Target and I all about died right there in the aisles. The Threshold Collection is ev-ery-thing. It should be called ThresHOLD-the-phone Collection. There were white ceramic animals, glittery everything, and gold and silver up and down the aisles. The prices were affordable, but I wanted it ALL which made it a problem. I know I haven’t even decorated for fall and Thanksgiving yet, but Christmas is just so much more fun to decorate for in my book so I couldn’t help taking a little sneak peek. Looking can’t hurt anything, right?

Here are some of the things that made my heart stop in the middle of the home decor section of Target.

This figurine. How cute would this look arranged on a coffee table tray or on top of a stack of books on my bookshelves?! It would be perfect to keep out all winter long.

Squirrel Figural

This pillow. I love that its Christmasy without snowmen or reindeer prancing across it. I’m hoping to slowly collect enough pillows to swap out all of my regular ones with Christmas themed throw pillows.

Noel pillow

This basket. I’m picturing this next to an accent chair with a white faux fur throw or a cable knit blanket. Perfectly cozy for the chilly weather we’ve been having.

Metal Basket

This stag. I am ob.sessed with deer and reindeer. Weird, right?  They are my absolute favorite animal. I’m not sure why, I just find them so cute! It’s really hard for me not to buy anything and everything that relates to deer. I think this stag would hold me over for a while…

Threshold Stag Head

This tree. The wooden tree feels wintery without being too cutesy. And of course, glitter. Glitter makes everything better.

Glitter Tree

This post is not sponsored by Target, nor does Target know I even exist. They just really know how to do Christmas up right. Where do you shop for holiday decor? Have a great weekend!

Now and Then

One of my favorite things about doing home projects is the sense of accomplishment I get from doing them. I always feel so proud of Nate and I for making a plan, learning something new, and following through with our ideas. Many of our projects we’ve never done before. Things like board and batten, building a wall of built ins, designing and building a kitchen banquette, and installing crown molding. Looking back on all of our hard work lets me relive all of the satisfaction I originally got from each project.

Here’s a look at what we’ve accomplished so far. We didn’t take pictures when we first moved in because we were so excited to start working. To show the “before,” I’m using the MLS pictures.

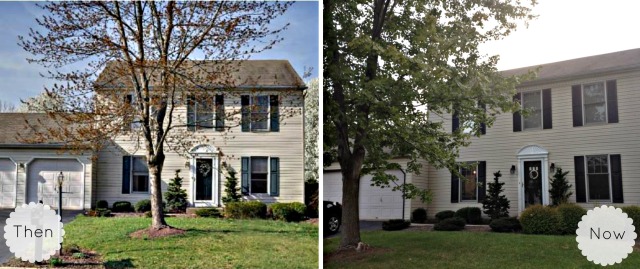
The outside of our house has already had a pretty decent face lift. I painted the shutters, painted the front door (twice), painted the trim around the garage door black and the garage door white, and replaced the three outdoor lights. The front door is currently a vibrant blue and I love it!

Front of House Collage

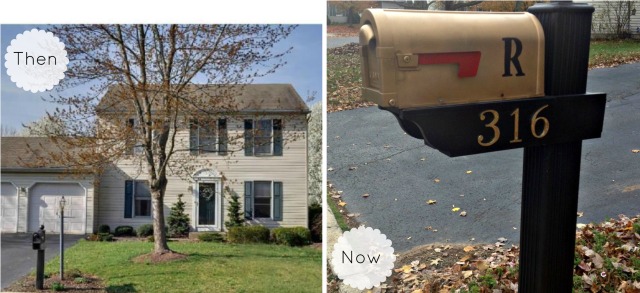
Our mailbox also received a makeover which you can read all about here.

Mailbox  collage

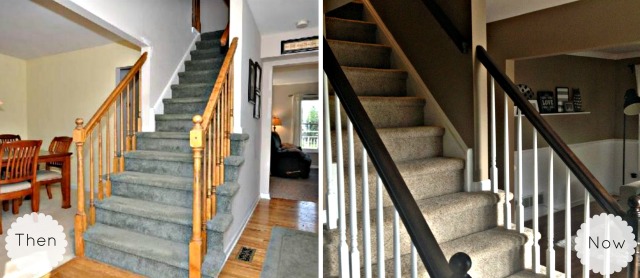
When you open the front door, the stairway greets you. We ripped up the old carpet and replaced it, painted the stairway, painted the balusters, replaced the old light, and stained the railing.

Stairway collage now and then

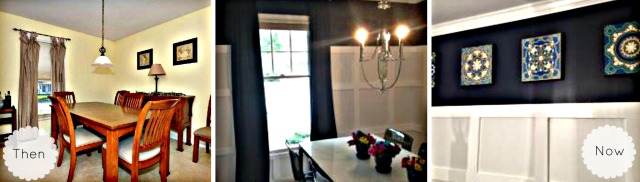
To the left of the stairs is the dining room. To add some interest to this room, we installed crown molding and a chunky board and batten treatment. We also replaced the builder basic pendant light with a modern silver chandelier from Lowe’s.

Dining Room Collage

To the right of the stairs is the formal living room. We painted the walls Iced Chocolate by Valspar, added a chair rail and crown molding, built a floating shelf, and re-purposed an old cart into a bar cart.

Formal Living Room Collage

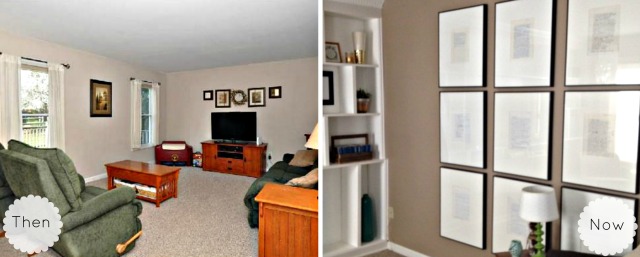
Towards the back of the house is the open concept living room where we spend the majority of our time. In this room we painted, built wall to wall bookshelves, and added a gallery wall.

Living Room Collage

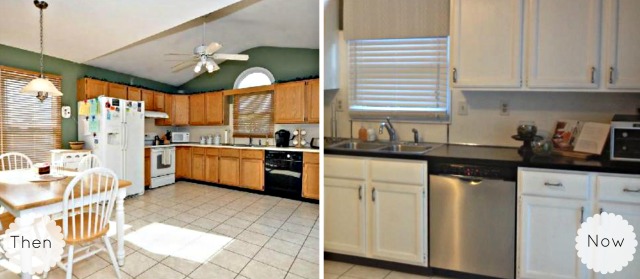
Next to the living room is the kitchen. In the kitchen we painted the cabinets white, coated the counter tops black, painted the back splash white, replaced the fridge and dishwasher with stainless steel appliances, replaced the broken sliding glass door with a french door, replaced the oak blinds with classic white blinds, fixed up the ugly pantry, and build a custom banquette.

Kitchen collage

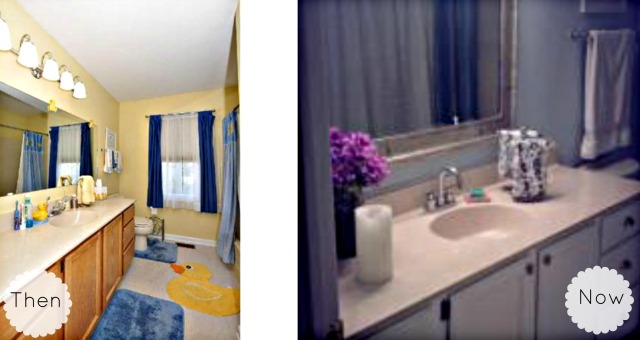
Next to the living room and kitchen is the hall bathroom. The hall bathroom looks totally different. We replaced the toilet, vanity, sink and faucet, mirror, and light fixture. We painted and added a toilet paper holder and towel ring. This was one of the first rooms we totally redid and I’m glad we fixed it up so early since it’s what our guests use every time they visit.

Hall Bathroom Collage

The upstairs has also had some major changes. To the left of the stair way is the guest bedroom. We painted this room and I added a faux picture frame finish to add some visual interest.

Guest bedroom collage

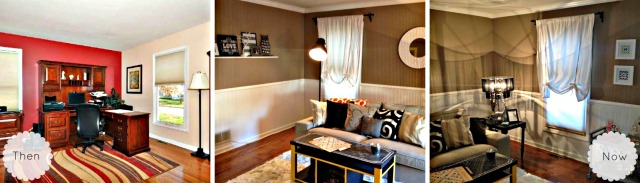
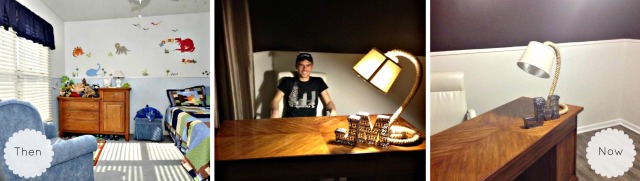
Next to the guest bedroom is the 3rd bedroom which we are currently using as Nate’s office. In this room we ripped up the carpet and laid laminate flooring and added a gallery wall. This room reflects my husband’s style way more than it does mine, but it’s his space so as long as it make’s him happy.

Office Collage

I love the guest bathroom. I just think it turned out so pretty and relaxing. I have no idea why this picture is so blurry though. To make this room fit our style, I painted the cabinets white, added brushed nickel hardware, replaced the faucet, added a mirror from HomeGood’s, centered the light fixture, and of course painted.

Guest bathroom collage

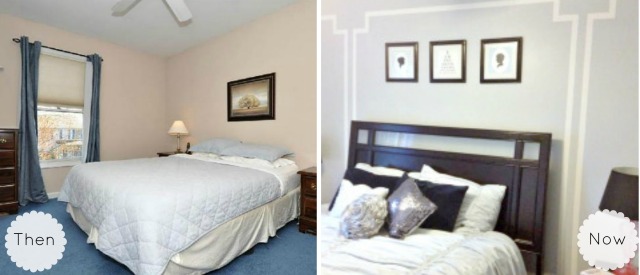
In out bedroom, we painted, installed thick crown molding, built industrial pipe curtain rods, hung burlap curtains, replaced the carpet, and built a wooden headboard.

Master Bedroom Collage

We have an en-suite bathroom and vanity area. We painted this room the same as the bedroom, added a new mirror to both areas, replaced the faucet, light fixture, toilet paper holder, towel ring, towel bar, and installed towel hooks.

Master bathroom collage

Home ownership has kept me busy busy busy, but that makes me happy happy happy. (Duck Dynasty is on while I’m working right now…) Anyone have any great before and afters they want to show off? Leave the link in the comments, I’d love to check them out!

Sticking it to the Man

I didn’t realize I was sticking it to the man at the time, but I did. I really let him have it.

Last week I stopped at Goodwill after work for no particular reason. I don’t think this is going to come as a surprise to anyone, but if you want to find awesome stuff at the thrift store you need to check back often, be patient, and have an open mind. I was working my way through the home aisles when I spotted glittery goodness. Someone donated an entire bag of gold and bronze glitter leaves. Perfect fall and winter decor and for $1.97 it was too good of a deal to pass up.

Leaf collage

Rewind to last fall. I was checking out the Dollar Spot at Target and they had items marked off 70%. I bought a branch wreath for 30 cents. 30 CENTS, PEOPLE! I should have bought them all! The wreath has been sitting in my craft room since last fall because I just wasn’t sure how I wanted to decorate it. Glitter leaves, meet wreath. Wreath, meet your destiny.

To make the wreath, I weaved the stems of the leaves through the branches to secure them. Hot glue wasn’t needed because I was able to use the wire in the stems to keep them in place. I alternated size and directions of the leaves to add variety. This project ended up costing about $1 (30 cent wreath and I didn’t even use half of the bag of leaves).

Leaf wreath close up

Front of house with wreath

You’re probably thinking “How exactly are you sticking it to the man?” A few days ago I was shopping at A.C. Moore with a friend to find inspiration for Christmas. We spotted some adorable leaves which we both wanted, but I didn’t need to buy any since I had already scored big time during my last Goodwill run. The most simple sparkly leaves were on sale for a 50 cents each at A.C. Moore and the fancy flowers were selling for 4-8 dollars. Not happening. It would have cost at least $15 to buy enough of the cheapest leaves to make the wreath. I’ll pass. I mean at that point, you might as well skip all the hassle and by a pre-made wreath.

Sam with wreath
Here’s a gratuitous picture of my dog, Sammy who looks eternally sad in photographs, posing by the door. Apparently, his life is horrible.

Final Score:
Chelsea: 1
A.C. Moore: 0

I win craft store, I win.

Stairway to Heaven

Actually, our old stairway could be more accurately titled the stairway from hell. The word “ugly” doesn’t do it justice. When we bought the house it had stained green carpeting, oak balusters and railings, unpainted spackle, and the same paint as the day the house was first sold. Our stairway is the first thing you see when you walk in our front door and it needed some attention right away.

Stairway before

During moving week, we replaced the carpet. We tore out the old carpet ourselves to save some money and replaced the carpet in the stairway, upstairs hall, our master bedroom, and dining room. I don’t want carpet in our dining room, but replacing the floors on the entire first floor is still a long ways away. The old owner’s dog used the dining room carpet as it’s bathroom so it had to go ASAP. The carpet is Stainmaster from Lowe’s and we paid to have it installed by them.

While the carpet was ripped up, we quickly painted the balusters white. It was such a spur of the moment decision. Someone had out a can of white paint because they were fixing up the window trim and I said hey we should paint that too! So we did. That week was such a blur that I can’t remember if I painted them, my mom, or my mother-in-law. Either way, the balusters were painted and it was a huge improvement.

We painted the stairway and the majority of the first floor Iced Chocolate by Valspar. By “we” I mean my father-in-law and friend, Jess. That first week we had a ton of help and knocked out pretty much all of the painting. We painted every. single. room.

One day, I was shopping at Target and I found a frame set on clearance for $12 dollars. I picked up scrapbook paper from Michael’s and hung the frame collage in the stairway. Things were really starting to come together, but it wasn’t perfect yet.

Scrapbook collage

We lived with it like this for over a year, but every time I walked past those oak railings, they made me cringe. I hate oak, I really really do so I decided to stain them walnut. You might be thinking, why would you stain your railings walnut, when the floors in the same room are oak? My rationale is why should I keep something I hate to match something else I hate? I also think it will be a kick in the pants to save money for new flooring downstairs. I’d love to do that within the next two or so years.

To stain the railings, here’s what I did:

Stairway collage

I used 120 grit sandpaper and sanded until I took off the shine from the last stain. Then I wiped the railings down with a rag to remove all of the sand and dirt. Then I started staining. I used Rust-Oleum Stain in Kona, which is a dark walnut color. I bought the stain months ago when we made our headboard so I didn’t spend anything on it for this project. I used a foam brush for the bottom side of the railings because it gave me more control. You can pick that up at any craft store for under a dollar.

To apply the stain, I used a regular paint brush with just a bit of stain. I really worked the stain in by brushing repeatedly even after my brush was dry. I wanted the railings dark, but I didn’t want the stain to be so thick that you couldn’t see any of the wood grain.

Stairs middle

For the top railing, it was held in place by 4 screws. I easily removed it from the wall and I stained it in the basement on top of 2 saw horses. I let it dry over night before reattaching it.

Stair finished 3

Stairs finished 2

Stairs finished 4

Stairs finished 5

Stairs finished

Project Supplies:
Painters Tape
120 Grit Sandpaper
Rag
Stain
Brush
Drop Cloth
Screwdriver

I already had everything but the painters tape, which I picked up from The Dollar General for $3.50. I probably used less than a dollar’s worth. Do you have any oak you’re dying to get rid of? Do it! You’ll be much happier. Trust me.

BP3W4G53265Q